ESP8266, Sonoff, & Echo
Prologue
I can be a little compulsive when I see a new piece of 'tech' and
have cupboards full of things I'll never use!
When I first discovered the Amazon Echo I was a little suspicious.
We've all encountered voice interfaces (Siri etc) and all of the
things I'd seen before left me completely underwhelmed &
thinking, 'So what?'
I looked a little more closely at the Echo, thinking it might make a
good Xmas present for my teenage daughter who loves listening to
music.
Taking the plunge
The more I read, the more I liked it. I bit the bullet & bought
an Echo Dot for £50. These are readily available at your favourite
PC store, Argos etc.
I chose the Dot because it's much cheaper than the 'big' Echo &
I'm far more likely to plug it into a sound system somewhere than
use it as a 'standalone' speaker device.
The instructions that come with the Echo are completely useless, but
I'm a seasoned hacker and had it running in only a few minutes.
I was immediately bowled over by the functionality of the thing!
I have a stereo in my kitchen. Normally I use a Bluetooth audio
receiver with this & play music from my phone. I'd checked that
the Echo Dot would do this for me & I wasn't disappointed!
The Echo supports the Belkin
WeMo switches out of the box, I'd always been tempted by these
but resisted buying any as they're not incredibly cheap. Suddenly I
wanted one!
However, one of my earlier compulsive tech purchases was a WiFi
switch rather like a WeMo but much cheaper. The
iTead Sonoff does much the same thing as a WeMo & I had
one of these languishing unused.
The Sonoff has an Espressif 8266 at the steering wheel, I've worked
with these devices quite a lot & felt sure it would/should/could
work with the Echo...
I felt sure that I'd read about using the ESP8266 to emulate a
WeMo... Ten minutes of Googling & bingo!
I found some Wemo
code on the web to use an ESP8266 masquerading as a WeMo to
work with Echo:
The guy who wrote the code was using a NodeMCU device to switch a
relay. To test it I just changed the relay pin declaration to light
the on-board LED:
const int relayPin = D1;

 To:
const int relayPin = D0;
Loading the code onto a NodeMCU board was immediately reassuring from the network traffic displayed on the serial terminal:
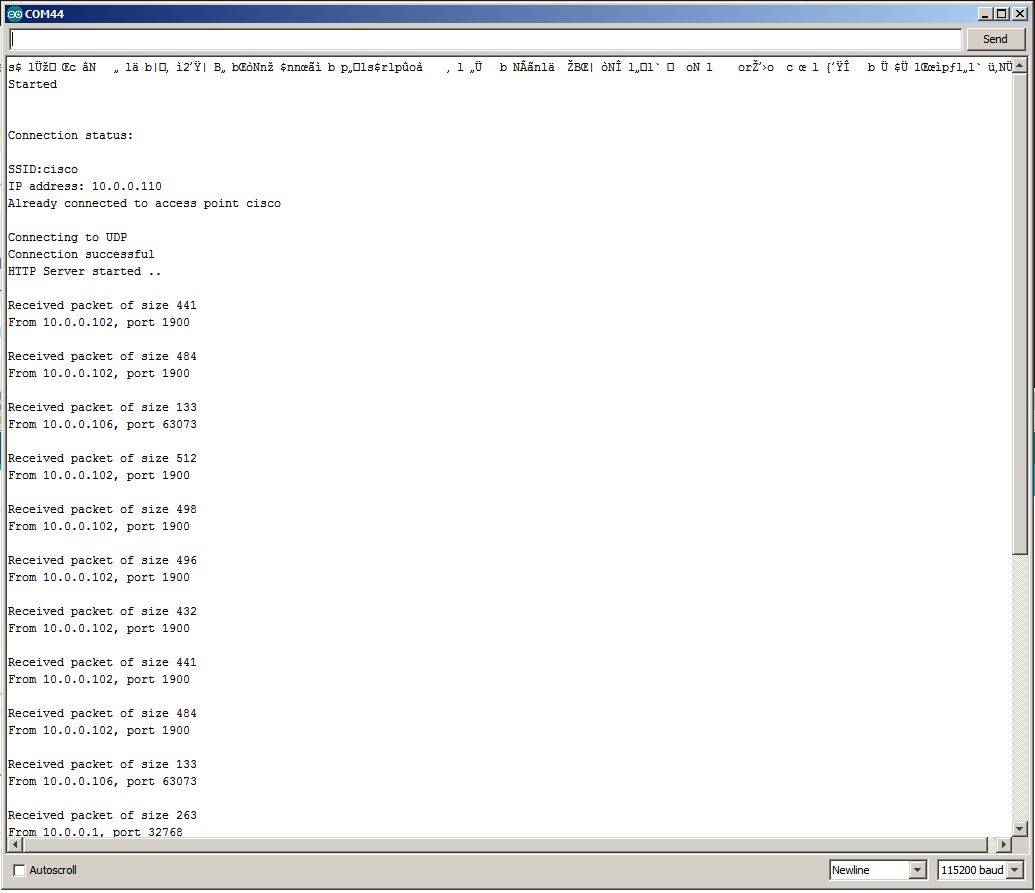
Echo awareness
The LED on the NodeMCU boards is on D0, & Bob's your uncle! Using this code I can talk to my Echo & switch an LED on & off! Somewhere in the code you will see a line:
device_name = "box";
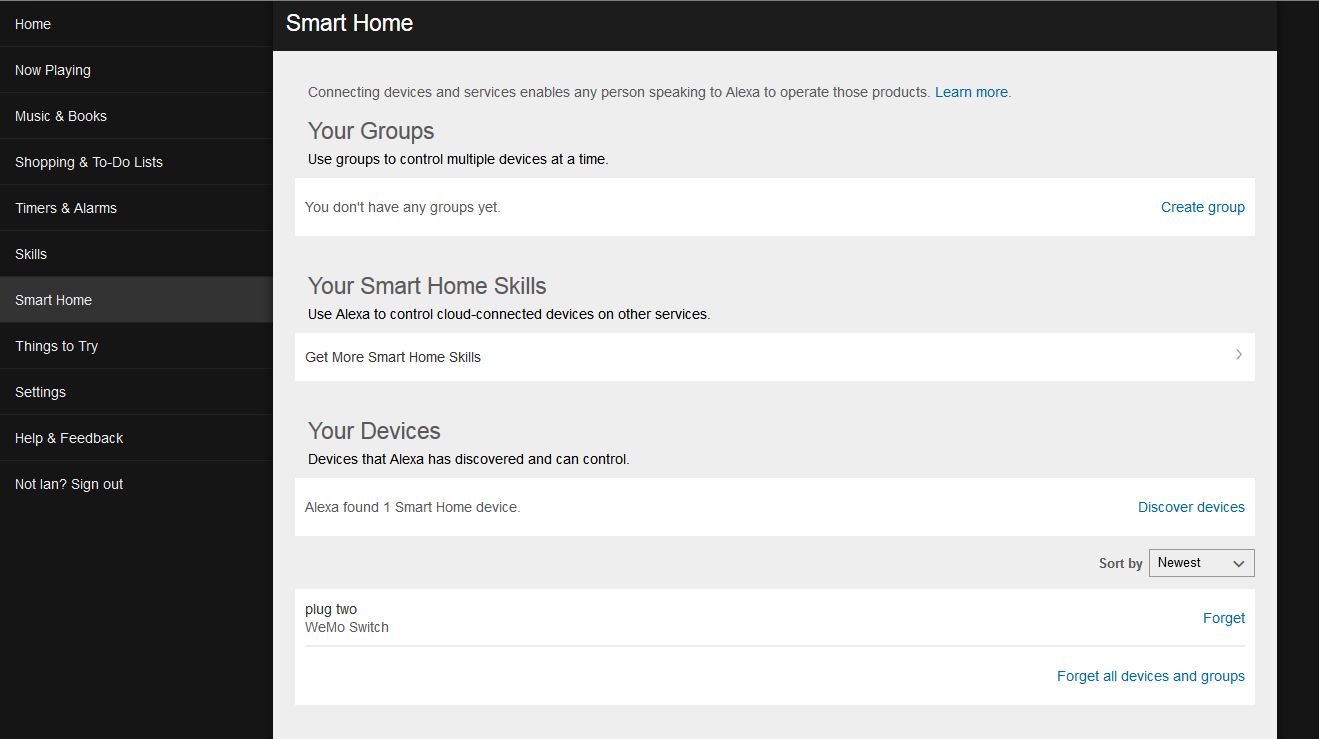
Echo needs to be aware of 'box' or whatever you choose to call it & this is achieved in the usual way, from the app on your phone or the Amazon website, I called mine 'plug two'
I must confess that I felt a little silly shouting, 'Alexa.' across my kitchen so I changed the name to 'Echo'. My daughter has a friend called Alexia which is a little close for comforrt.
We don't have much choice here, it's Alexa, Echo, or Amazon. So, I holler, 'Echo, switch on plug two!' And, as if by magic, plug two switches on :)
Programming Sonoff
The next step is to put the code on the Sonoff. If you're familiar with the ESP8266 this isn't a huge hurdle. A decent explanation of how to do this is on Peter Scargill's blog. and here.
I was thrilled to bits that this worked so well! It's incredibly rare that I get so much success in one evening! After only a few hours of work I could switch my table lamp on & off just by talking to my Echo!!
I've also tried this with the Sonoff S20 (a WiFi mains socket rather like the actual Belkin Wemo) and it works very nicely.
Limitations
After my initial euphoria wore off I began to consider the limitations of this setup. Programming the Sonoff isn't too difficult but it is fairly tedious and a definite no-no for the uninitiated. What if I want to change the name? Use a different network? Etc etc. Pulling the things apart each time we want to make a change isn't a great idea.
The informed reader will be thinking that the ESP8266 can use OTA (over the air) programming, sure, that's a possibility but the Sonoff doesn't have tons of memory to support this (1MB) and I also wanted to give some re-purposed Sonoff's to friends & family as Xmas presents :)
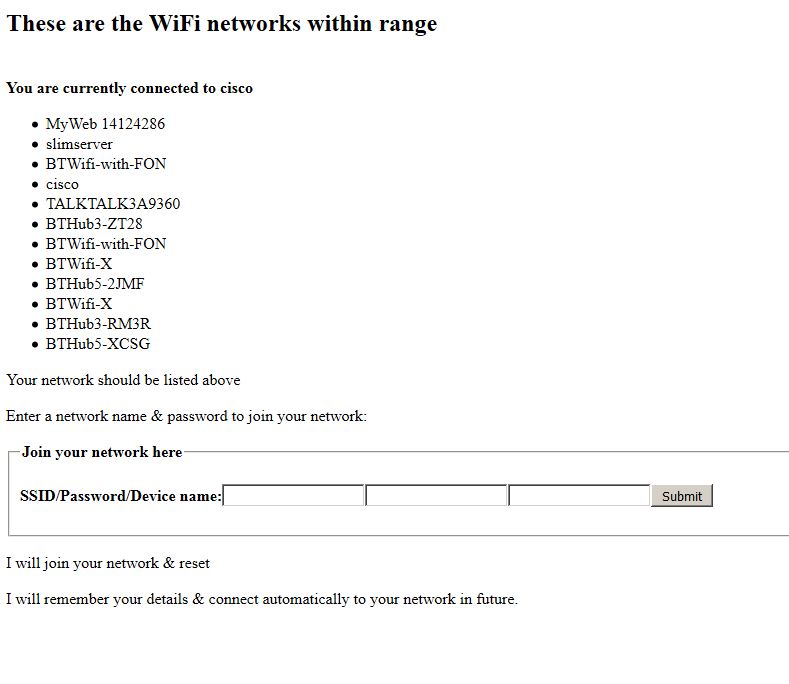
Excellent as it is, the code I tried isn't plug & play so I put on my thinking cap - the one with a 'D' on the front! My thinking was that the Sonoff could start up & if it couldn't connect to a network it would fire up an access point & webserver.
The webserver could display visible networks & invite you to choose your network from a list, enter your credentials & off we go.
I've used this approach before in other projects to good effect so I already had some working code. The final detail was to allow the user to change the name of the device, this isn't difficult - I just added another field to the web form.
To my embarassment, what took a long time was working out how to save (& restore) the name in EEPROM in order to survive power cycling. It only took a few lines of code!! Be generous - maybe I was getting tired?
Finally(?)
This is what I came up with:
So far, so good! Now I can reconfigure a device without tearing it apart! It's early days - this all works very nicely but it's far from tested, let alone bullet-proof!
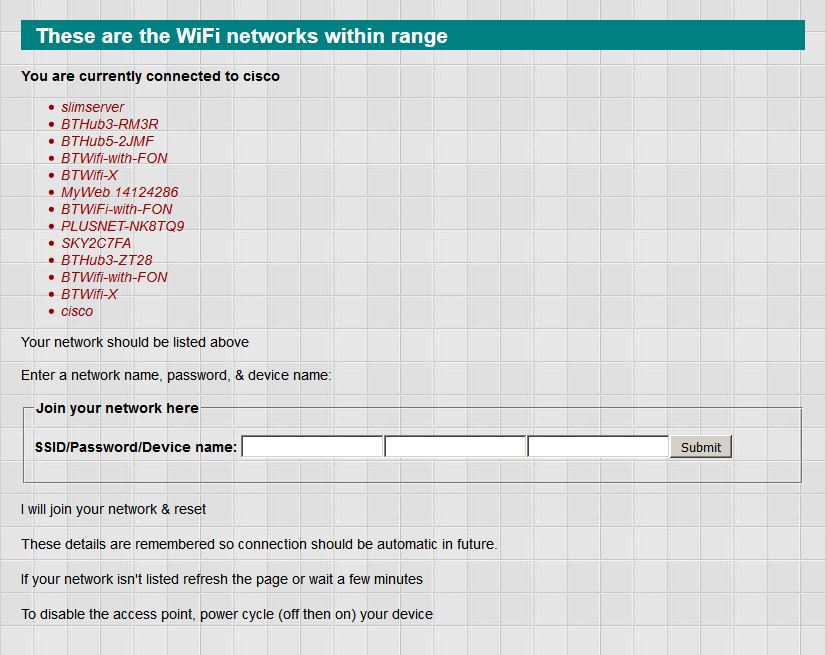
Feeling pleased with myself, I added a SPIFFS file system & stylesheet (the same as this one) to the webserver to make it a little prettier. :
I also added OTA (Over The Air) programming as it's tedious uploading SPIFFS images serially and I was growing tired of opening the box to make changes.
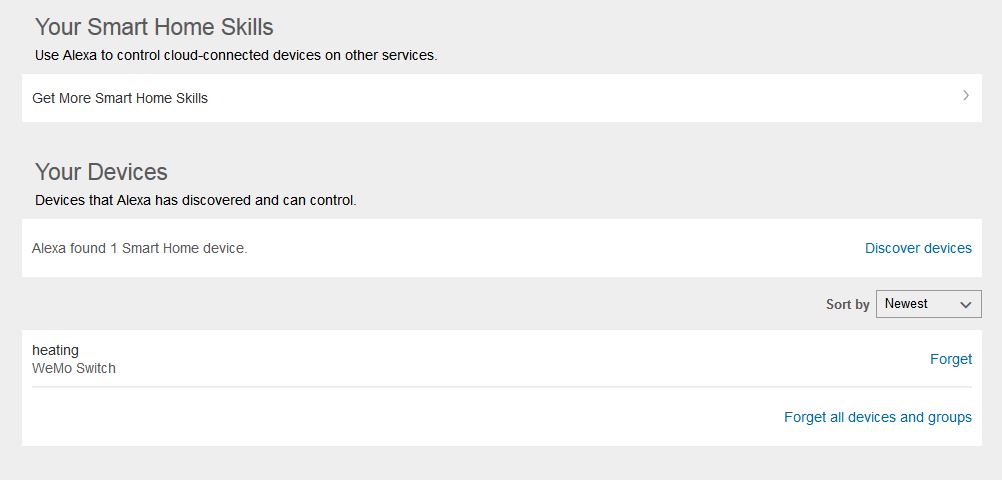
I only had one Sonoff device until very recently. I'd used this to give a few demonstrations but actually wanted to use it for real, at home. I have two immediate applications: one is to switch on my Xmas lights & the other is to switch on my central heating. The Xmas lights are trivial (see below) so I won't bother with that here. I've looked at my central heating several times in the past and never been entirely satisfied with any of my solutions, so here we go again! Creating the 'switch' is easy enough - that's what I've done above, this time I call it 'heating'
And then I have to wire it in...
Possibly the biggest obstacle to home automation is persuading old technology to work in new ways, and central heating is a great example of this. I live in a 21st century house which was built with 19th century technology!
I've had problems with my heating in the past, and as a consequence I'm much more up to speed with how it all works than I probably want to be!
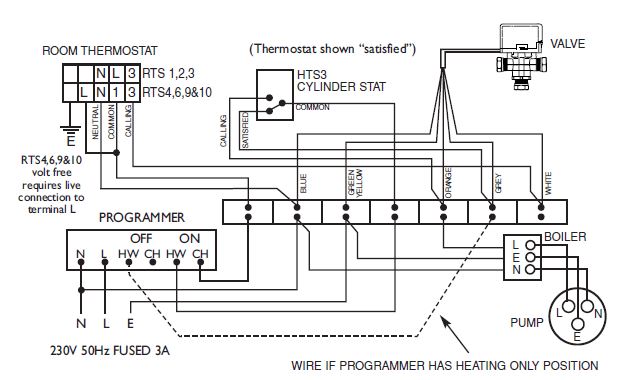
The wiring diagram below shows how my, & countless other systems work. The way that I use it isn't obvious from the diagram but helps me enormously in what I want to do.
The room thermostat would sensibly be located in the 'living room' it's not in my house, it's right next to my front door! It is absolutely useless there so I replaced it many years ago with a wireless thermostat which I can place anywhere. The wireless thermostat also has a timer, so in practice the 'programmer' is set permanently on.
The thermostat is effectively left in control & this is where I 'override' the controls to manually switch on the heating.
The long rectangle in the image is a 'contact block' hidden away in my airing cupboard. It has live and neutral connections and the heating is switched on by making the white wire live.
I've not wired it in yet as I don't seem to be home much in daylight hours just now & I prefer to switch off the power when I'm doing something like this.
I have a few Sonoffs to use now so I thought I might try using 'groups' with the Amazon app.
Being the festive season, I have a few sets of Xmas lights which seemed obvious candidates. It's very easy to create groups with Echo:
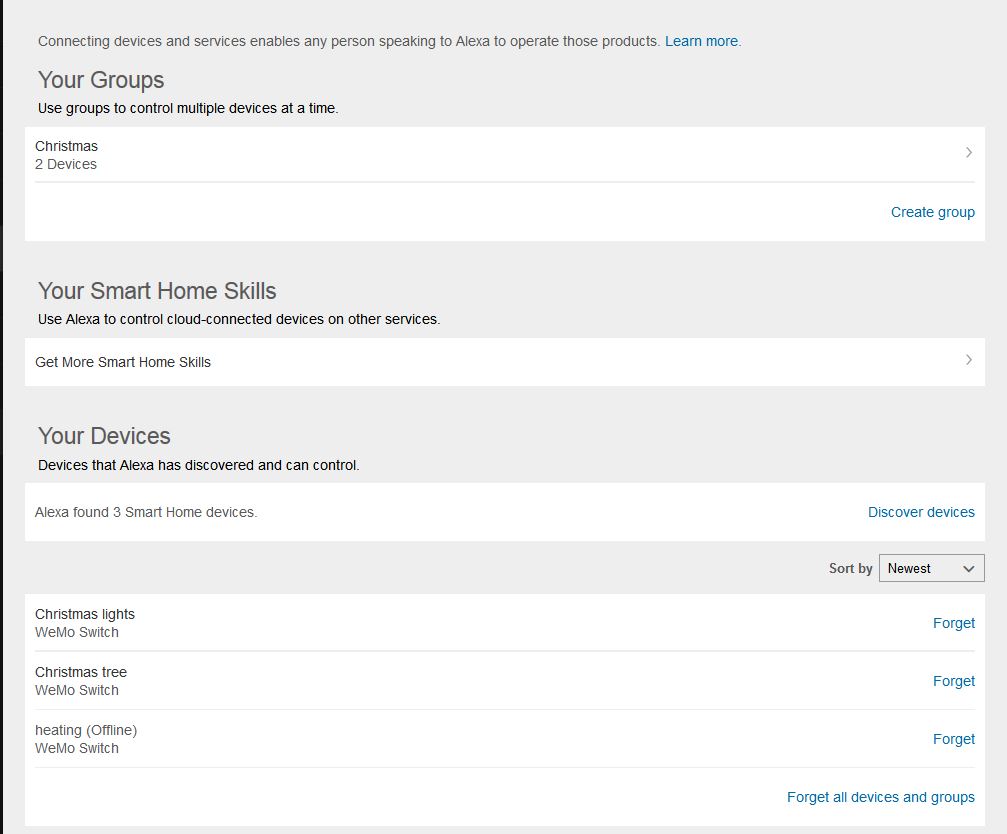
The idea being that, 'Echo, switch on Xmas!' Will turn on all of the lights but still give me individual control.
My code is split into several files but it's available here as an Arduino project.
Ian Sexton 2016